
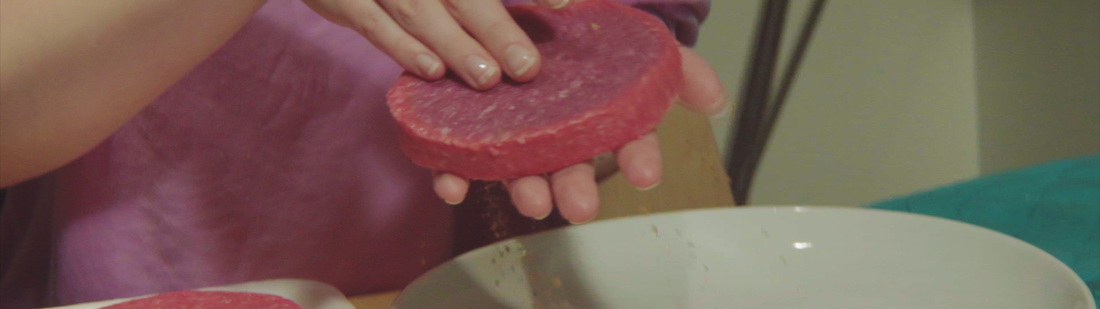
 Well not only was this week's video late, but my god the issues that were behind its tardiness. But only a couple days late and we are here now! This week's prompt was "Take an amazing portrait of someone, make a mess while you are doing it." I had a few ideas for this week but none of them were really going to work for what I wanted to do. Luckily what I was making for dinner would work for this week's shot, at least well enough. So I decided to shoot a slow motion shot of my fiance seasoning the raw burger meat we were about to throw on the grill. One thing that was cool about this week was it gave me the opportunity to test out some new gear! So let's go ahead and watch the video real quickly. So this week was actually shot differently than the rest! WOO! Change! I shot this week on the Sony a6300 in 1080p, 120fps recorded to 24fps, 6400 ISO, 1/400 shutter, in XAVC S at 100mb/s.
Despite not shooting in RAW, this camera created great images and gave me the ability to shoot at a higher frame rate for slow motion. Also since this camera shoots 4K this will give me the opportunity to shoot at true 4K and squeeze images rather than stretching them when I am not shooting for slow motion. I also had to shoot on a different lens than normal for this week because the a6300 has a bigger sensor than the BMPCC. This meant that not only would a 35mm not work without vignetting, even a 50mm wouldn't work! So I had to jump all the way up to 80mm using a vintage 80-200 f3.9 telephoto lens. Now onto the shoot. The bad things for this week were all not directly related to the shoot, but affected the post production. Due to numerous issues with my computer I actually had to go into data recovery mode just to be able to post this week's video. My OS on my editing machine got messed up and I had to reinstall it. Then the drive that had all my fonts on it, including the one I use for my titles, took a dump on me. As soon as I was able to recover the data off of the drive, I was able to make my title cards. Phew! Other than those technical issues, the shoot for this week was a breeze. Not only did I get to shoot with a new camera, but I also got to shoot with some new lights! Through Patti Healy-Kelly an Hanson Fong, I now have a set of continuous quartz halogen lights that put out a whopping 750 watts each. So for this shoot I set up one of them so that I would have enough light for not only the shutter necessary for slow motion, but also the F stop needed for the anamorphic lens. The nice thing about using a hot light like the one I used is that there was not an issue with flickering when shooting slow motion, but that was only shooting at 120fps. Well that's it for this week. Again, if you are participating in a 52 week challenge, cinematography or photography, please share your image for this week in the comments below!
0 Comments
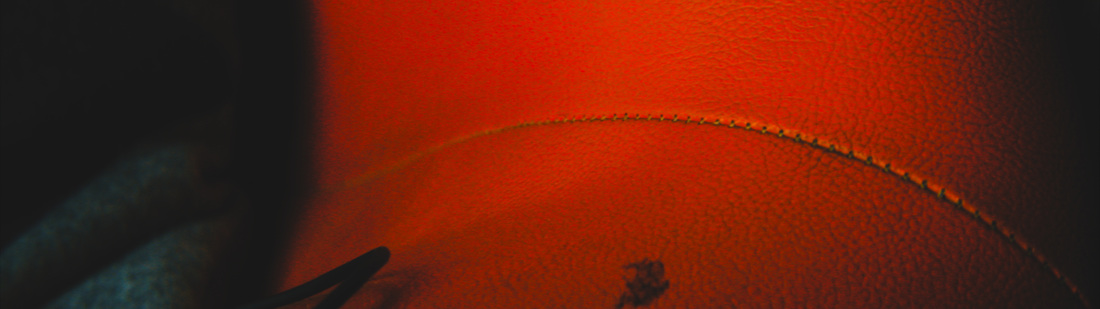 Welcome back yet again for another week of the Anamorphic Cinematography Challenge! This week is brought to you by our sponsor...oh who am I kidding, what sponsor?! Anyways, let's get right into this week. This week falls under the category of artistic with the prompt being to shoot texture, specifically, "The artistic inspiration this week is texture. You should almost be able to feel the image." So I sat and pondered for a bit and had quite a few ideas float through my head before I had the realization that the vintage chair I was sitting in had great texture! The old orange vinyl with the stitching starting to show more with age, it was perfect! So I threw on a macro lens and got to shooting. Let's check out this week's shot now. This week was shot with the BMPCC in 1080 30P compressed cinemaDNG RAW, at f5.6, 180 degree shutter, 800asa with the B&L Anamorphic Projector lens attached to a Sigma 18-50mm lens at 35mm.
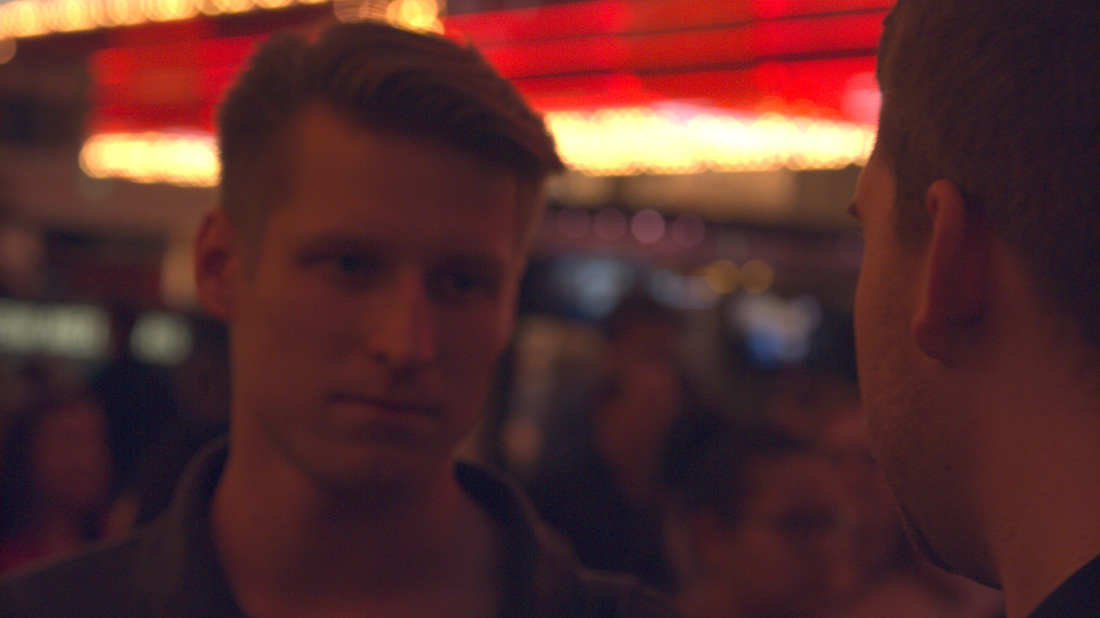
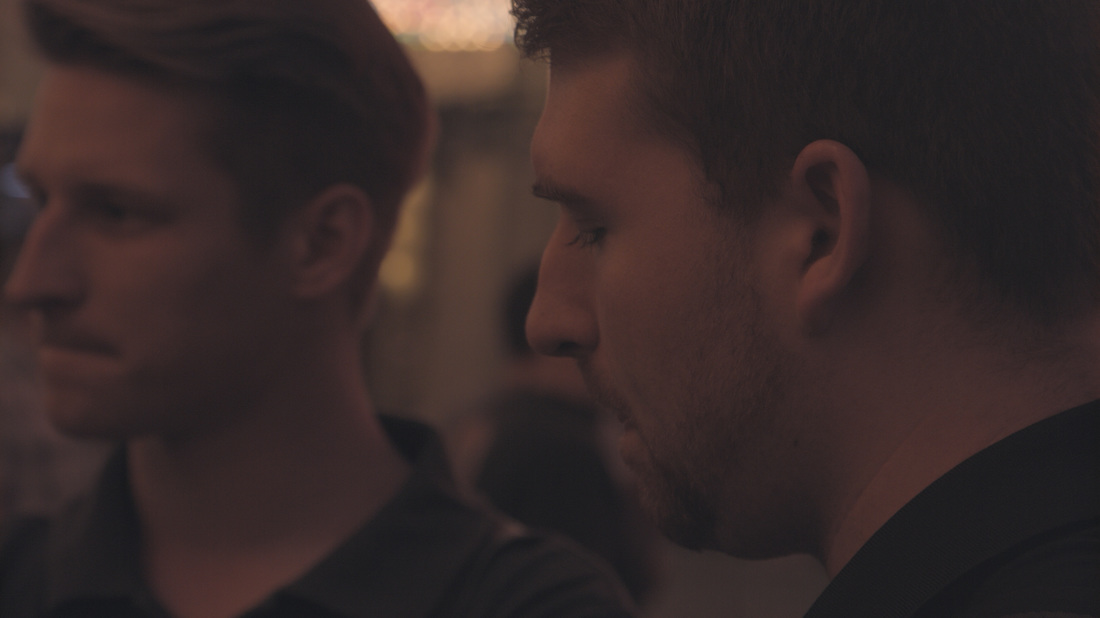
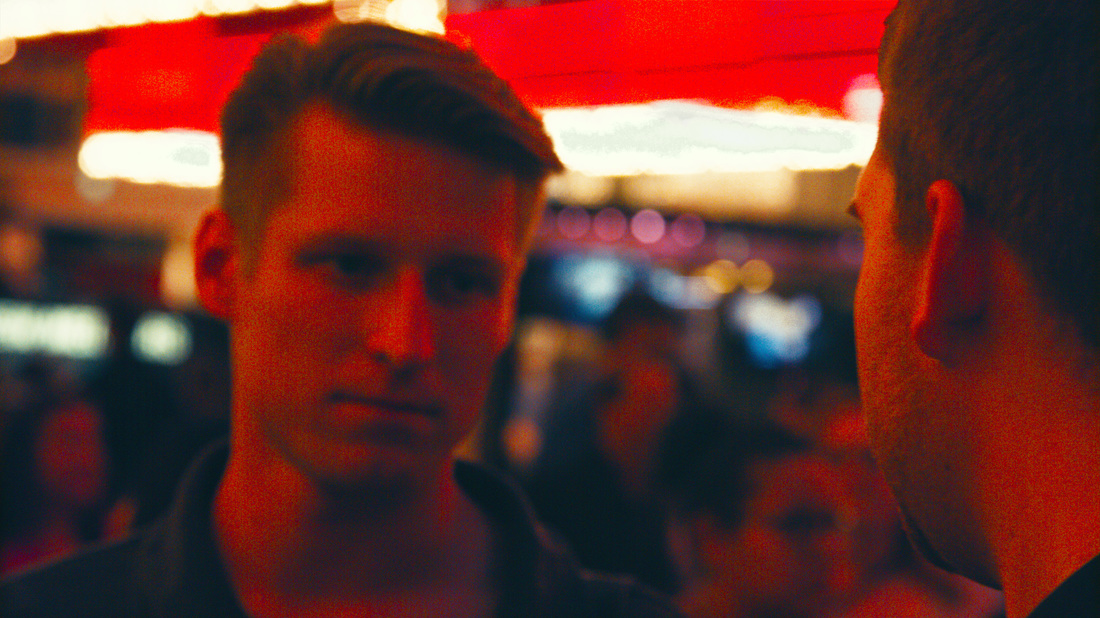
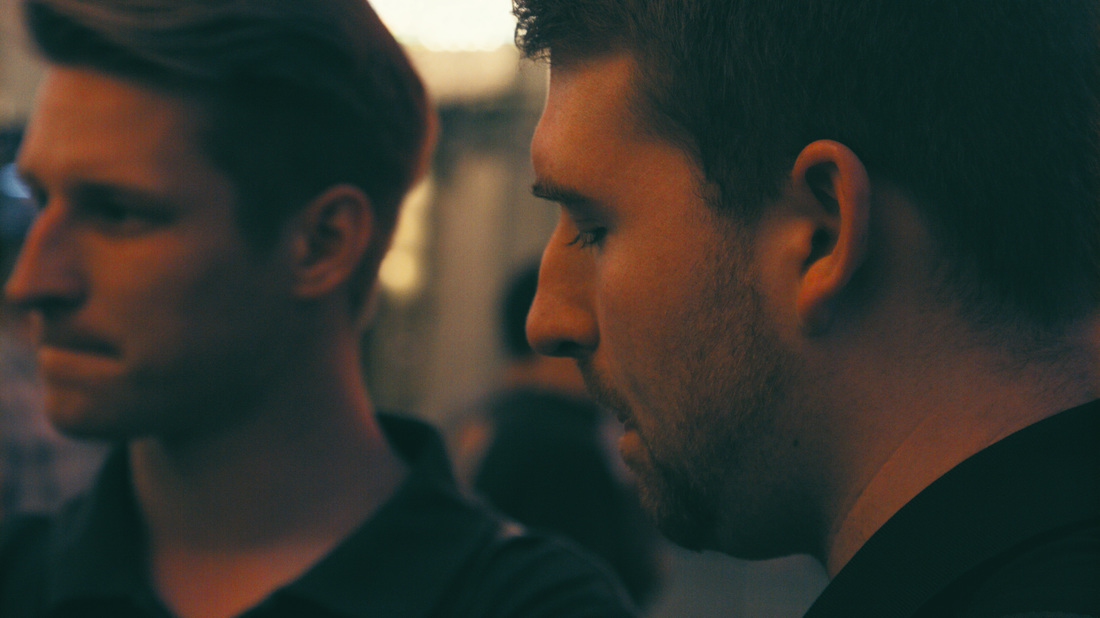
So let's start off with the negative stuff this week since I've been in a negative mood all day anyways. My first issue with this shoot was really myself. I was having the worst handheld day that I have had in a long time. I really wanted to shoot this handheld so that I could have movement beyond a pan or tilt. I wanted the camera to be able to move on three axis to add some character. But of course my hands had to have some unnatural shake to them that led to very unsteady footage. Even with some warp stabilizer on it in post production I couldn't seem to get it to smooth out at all. In the end I said eff it and went all frozen on it (I let it go). The next issue I had was deciding on which portion of the shot to use. As I limit myself to 15 second clips I had to pick which portion to use and of course like the beginning and end but not the middle. I decided to go with the beginning because I really like how much texture shows through on the vinyl. The dirt in the vinyl shows the life that the chair has been through while the stitching also shows up really well. The final negative I have for this week was lens mounting. Somehow my anamorphic lens was not 100% lined up with the taking lens and I ended up with a bit of black vignetting. Normally I'm fine with a bit of vignetting but not this time. No, the vignetting was in only one corner. ONE! This meant that to hide the REAAAALLY heaving corner vignette that I had to zoom in on the whole image to 105% to hide most of it. Luckily the rest that was left behind was mostly hidden in the darkness of that corner of the frame. To get the macro this close I used two macro lenses stacked up, a +1 and a +2 so that I would have a +3 lens. I've played around with my +4 lens before and it was just a bit too much which also meant that the +10 was out. The final aspect of this week that I did like though was the surprise texture that showed up in the pillow that was sitting on the chair. I really like how the wool texture came through so well at the end, even if it is only for a second. So that's about all I have to say about that. Make sure to come back next week! And as always, if you are taking part in a 52 week challenge whether it is photography or cinematography, please share your shot for this week in the comments below (considering no one ever shares I'm beginning to feel like I'm talking to myself a bit). While at NAB Show 2016 I got my hands on my buddy Bart Johnson's (Bart Johnson Productions LLC) Black Magic Design URSA Mini 4.6K cinema camera while we were out at Fremont Street to put it through some tests with Nate Brubaker of Rock Shore Media. If you have ever been to Fremont, you know that the lighting conditions here are harsh to cameras, so we figured this would be a good place to put the camera through its paces. What we found was that the camera does create great images, but there are also some downfalls. Overall Design Overall the design of the camera is really nice. The URSA Mini is much lighter than its predecessor, the full size URSA. There are two versions of the URSA Mini, the 4K and 4.6K. We were shooting on the 4.6K which has a better sensor than the 4K, not just in resolution, but in dynamic range as well. The built in monitor on the camera is really great. It is bright, sharp, and does relatively well in daylight for visibility. My only slight complaint was that it was very stiff to move, but I am sure that was due to the camera being brand new and it should loosen up with further use. The button arrangement on the camera is good, everything was very easy to access. My only frustration was that I had to look at the side of the camera to find the record button when I wanted to start or stop recording. We were shooting with a Wooden Camera top handle which made handheld shooting really nice on the camera. The handle mounted in a way that gave the camera a really nice natural balance in hand. There was only one REALLY huge flaw with the overall design, but it is something Black Magic could easily fix. The flaw has to do with the Operating System (OS) of the camera. We started the night filming at 4K Prores 422, but of course wanted to get at least one test shot in RAW. So I popped the camera into RAW and filmed one shot then without changing anything else set the codec back to Prores 422. In my haste I did not notice the automatic change that occurred. The camera automatically set us to 1080p instead of 4K. We went on to film a bunch of shots in 1080 rather than 4K until Bart noticed the change. We went back and tested and sure enough it was due to the camera auto changing resolutions that we ended up in 1080. So Black Magic if you're reading this, fix that right away! The other thing is that this thing shoots to CFast cards, which as we all know, are insanely expensive. To get enough memory to really feel safe shooting on this thing would cost almost as much as the camera. But by using CFast cards instead of solid state drives like other cameras in the Black Magic lineup, this gives the camera a pretty sweet feature of dual memory slots. So overall, the design of the camera is prettygood. Image Quality Now we get into the really important part, the images that come out of the camera. From the test that we did, I have to say the image quality is nice. We were shooting at 1600asa on an f4 lens at 4K in Prores 422. Let's go ahead and watch the footage we shot. The first thing that I noticed when taking the footage into post was not the magenta color issue everyone else has noticed, but the Fixed Pattern Noise (FPN) that I could see faintly in every single shot. While we were shooting at 1600asa and Black Magic cameras are not known for their lowlight abilities, it was disappointing to see the FPN. I personally own the Pocket Cinema Camera and although it gets noisy at 1600asa, it doesn't have such a problem with FPN. I was most disappointed about this simply because Black Magic cameras have such a great ability to create filmic noise that is more similar to grain, but FPN is always ugly. So to try to remedy this, I used a high contrast, pretty harsh Lut/grade that actually did help to reduce the visibility of the FPN pretty well. In the end, I was actually pretty happy with the footage once it had been colored. But here is where I really ran into an issue. I shot a single clip in RAW on the camera which should be the best image quality out of the bunch for color and lack of noise. Instead, this clip has the most obvious noise that didn't go away with the same color grade used on the rest of the shots. It also showed off the magenta issue reaaaaally badly. See the examples below. Click on the images to see them full size.
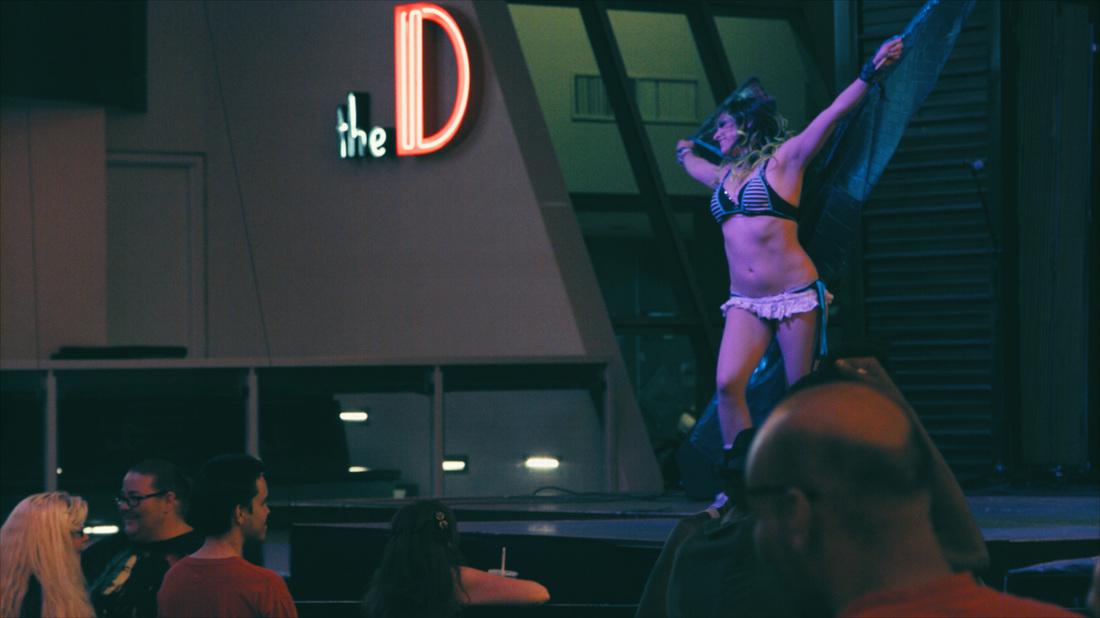
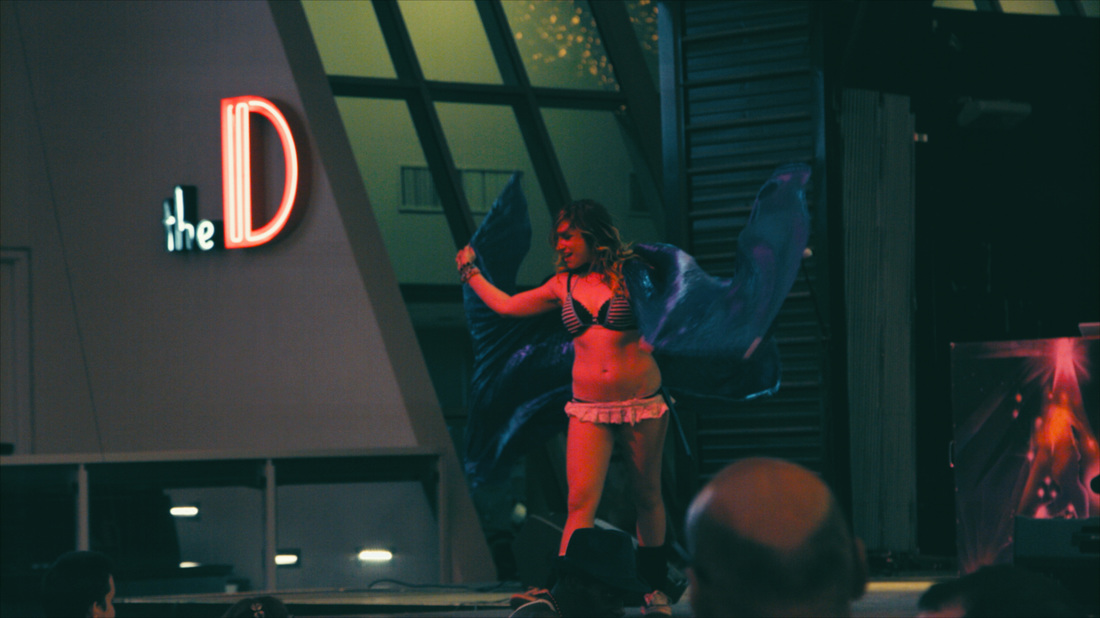
The colored image above is using the exact same color grade as the similar shot that was filmed in Prores. As you can see, the color difference is exponentially different. Not only does the uncolored RAW image show up as really red, but it becomes even more noticeable when colored. The best part of the image quality that I noticed was how it handled skin even in such harsh lighting conditions. Even with the high contrast grade that I used, including my favorite Kodachrome emulating Lut, skin looks good across all the lighting conditions. See the below images of a performer under different lights Click on images to view full size.
Also, the images coming out of this camera are very sharp without getting into the realm of being too sharp and digital looking. Proof of how good the image sharpness is is that even though we shot a lot of footage at 1080p, I was able to upres it to 4K and it seamlessly blended with the 4K footage on a 4K timeline.
The final flaw that we ran into was yet another when shooting in RAW....we had skipped frames. Both myself and Bart tested the RAW shot in Premiere Pro and both ended up with skipped frames. I tried to open the clip in Resolve to test it but Resolve didn't want to recognize the file as a video, instead the individual dng files showed up. I'm guessing this might have been due to the missing frames, but I am unsure as I honestly didn't bother troubleshooting. Final Thoughts The URSA Mini 4.6K has a lot of potential. I think that with future firmware upgrades and proper lighting conditions, this thing can create absolutely, stunningly, phenomenal images. But as of right now, it has a little ways to go. In regards to the use of CFast cards though, there are was a new product that Bart tested at NAB Show that uses dual dummy cards to output to a solid state recorder. Depending on the cost of this adapter, this could be a great option to bring the down the overall cost of the camera and put it in the realm of affordability. To check out all of the tech reviews and information Bart has, pop over to his YouTube Channel Bart Johnson Productions. For more of Nate Brubaker's work, check out his website rockshoremedia.com 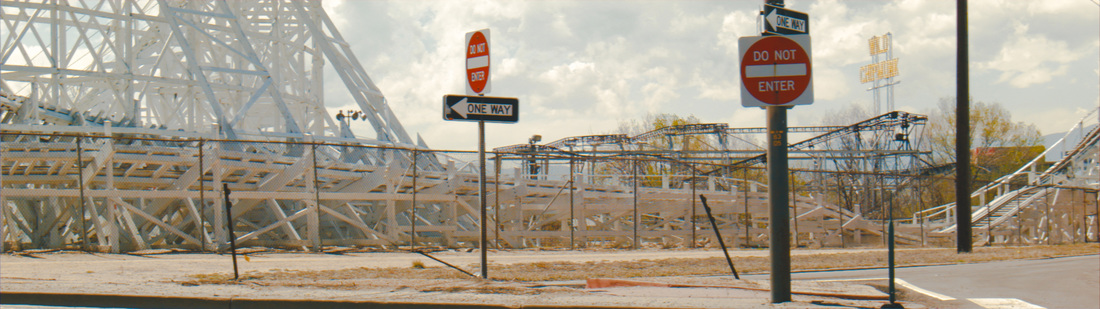 Ah I love the feeling of being all caught up, well with at least one thing in my life! This is the shot for this week, week 17 of 52. This was another one of those weeks that I didn't have to sit and ponder what I was going to film. I already knew. The prompt for this week was to shoot a landscape showing off an urbanscape. The exact prompt was "Most Landscapes are wide open spaces of natural beauty... this week find the beauty of the urbanscape/cityscape." So for this week I went to a place that holds a place in many a Denver citizen's heart, Lakeside Amusement Park. What could be better than all of the lines of an old wooden roller coaster at a classic amusement park? So let's take a peek at this week's video then get into further details. This week was shot with the BMPCC in 1080 30P compressed cinemaDNG RAW, at f5.6, 45 degree shutter, 200asa with the B&L Anamorphic Projector lens attached to a Sigma 18-50mm lens at 50mm.
I decided on the Lakeside Amusement Park because it has a great classic wooden roller coaster. Once I got there, I picked my shot location for it's proximity to the highway on ramp that is right next to the park. I knew I was going to shoot with some sort of camera movement and wanted to get just a bit of the highway in the background as I moved the focus of the shot to the roller coaster. I just felt that nothing is more fitting of an urbanscape than a highway. But I didn't want that to be the focus, in fact I wanted it to be subtle, so all you actually see of the high way on ramp is the curve of it at the beginning of the shot. I also really like how the mountains turned out in the background. There was a storm starting to roll in way off in the distance so the haziness caused the mountains to blur together into a bluish silhouette with an almost water color look. I also like all the texture that came out of the clouds. In the raw shot, they are actually quite bland and blended together, but with my favorite vintage kodachrome emulating LUT, they really came out nicely. Now my least favorite part of this shot/shoot was the traffic. I could not get a steady break in traffic long enough to get the shot with no cars. Normally this wouldn't bother me that much, but I really don't like how the cars show off the rolling shutter of the camera. As anyone who has ever shot on the pocket cinema camera knows, the rolling shutter on it is absolutely awful. Anything moving that fast, like I don't know maybe cars, will come out looking slanted. I even tried using rolling shutter repair to make the cars look less angled, but it was a no go. Did literally nothing to make them look better. So I said screw it, I like the shot enough even with the cars that I can let my perfectionism go long enough to export the clip. The other tough thing that I had to deal with while filming this was the sun. Although there were tons of clouds off in the background, there were none providing any relief from the very harsh sunlight. This means that any fine lines or really bright areas will become victim to the anamorphic projector lens' chromatic aberrations issue that I have noted before. The only plus to this lens is that it tends to give a better highlight rolloff than any of my other lenses. This is good because that is another area the pocket cinema camera lacks in, highlight rolloff. It does not create soft rolloffs whatsoever. In fact, I've noticed that my little Canon t3i DSLR has better highlight rolloff than the pocket cinema camera. But I just love that 13 stop dynamic range and shooting raw too much to use my DSLR over the pocket cinema camera. So that's all for this week. I hope to see you next week! If you're participating in a 52 week photography or cinematography challenge, please share your image for this week in the comments below! 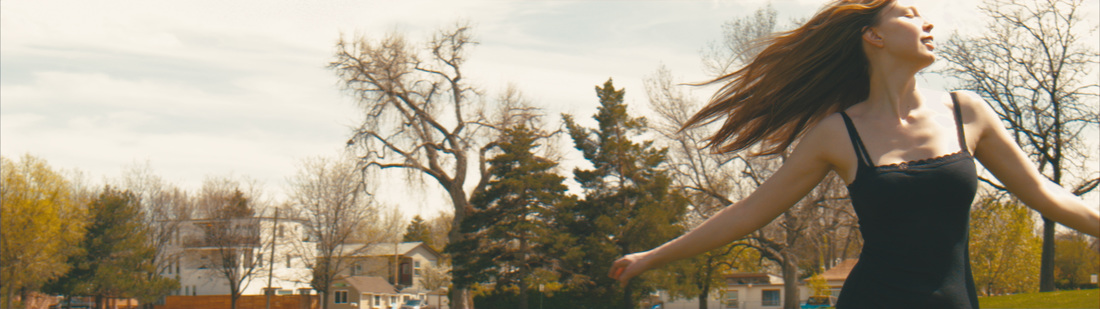 Well this week we are a week behind, so be prepared for another posting this week! That's right, this is only post one of this week! Where was I last week you ask? Well, I was in my favorite and least favorite place that I go to every April...Las Vegas! Oh yeah, it's that time of year, the time for NAB Show! 2016 was yet another good year, but it did keep me away from the anamorphic challenge since, I'll be honest, there was no way in hell I was lugging around the anamorphic rig in Vegas. So coming back the first thing I had to do was play catch up, shooting first my shot for week 16. The prompt? Movement. So I dragged my fiance out to a park and knocked this one out of the park (some pun intended there). The prompt for this week was "Most portraits are stationary, so this week explore adding some movement. Dancing, twirling, or even hair flips." So enough prattling on, let's go ahead and watch the video shall we?! As always let's start with the tech specs behind the shoot.
This week was shot on the BMPCC in 1080 30P compressed cinemaDNG RAW, at f5.6, 45 degree shutter, 200asa with the B&L Anamorphic Projector lens attached to a Sigma 18-50mm lens at 50mm. So this week I want to start with what I liked about the shoot instead of the difficulties that came up. First of all, my favorite part of this week was filming with my favorite person. Everyone knows that a shoot is much more fun when you work with people you care about and enjoy being around. The other part of the shoot that I really liked was how the footage looked with just a tiny bit of slowing down. I shot this at 30fps but edited at 24. This means that I could slow the footage to 80% speed while still maintaining a smooth look. That 20% decrease in speed actually made a huge difference. It gave the shot a sort of surreal feeling rather than one of realism or slow motion. It's hard to put into words the effect, but I most notice it in the background towards the end of the shot. My next favorite part of the shoot was simply the weather. It was a great sunny day, no wind for once, and there were actually clouds in the sky. As I have said before, I'm a big fan of clouds since they add depth to a shot and are more interesting than clear skies. I also love how the harsh sunlight worked out in the still moment that I chose for sharing this shot. It works out so that her spin and smile line up perfectly with the warmth of the sun as she turns into it. Just fantastic. Now let's talk about difficulties, beyond getting my fiance to step in front of the camera. The biggest difficulty I came across was deciding on movement. At first I tried to do handheld shots following her as she walked. I didn't end up liking how these were turning out, mostly because since the weather was calm, her hair didn't move and it really didn't scream movement (beyond the camera itself moving). In the end, my fiance is actually the one who suggested spinning when I got tired of lugging the camera and said I wanted to come up with a shot that didn't involve carrying the camera. So really you could say that this shot came out of laziness. So all in all there weren't many difficulties for this week's shot, and I'm really happy with the way that it turned out. Stay tuned to see the next shot that is also coming out this week! And as always, if you are participating in a 52 week challenge, whether it be photography or cinematography, please share your shot for this week in the comments below! |
AuthorAlan Meyer is an experienced cinematographer, but is no stranger to writing. Archives
June 2016
Categories
All
|

 RSS Feed
|
|
Thornton CO, 80233
alanmeyervideo@gmail.com |
|